Last Updated on January 17, 2023 by James Dziezynski
Ah, Little Bear Peak, so we meet again.
This 14,037’ summit in the Sangre de Cristo Range has a well-earned reputation as having the most difficult standard route out of all of the 58 recognized 14ers in Colorado. As a fellow climber remarked on her way off the mountain, “It’s a beast!”.
This is true. Little Bear is a beast.
Climbers have two options for reaching the summit. A summer climb involves class 4 scrambling on very loose and unreliable rock, especially by the standard Southwest Face / West Ridge route. The notorious Hourglass Couloir is a funnel for stones accidentally kicked down and has been the site of many accidents and close calls. Add to that, the Hourglass proper is often streaked by a cascade of water that can freeze over any month of the year.
The second option is waiting for snow to blanket the mountain. In early winter, avalanche potential tends to stay high. The danger in the Hourglass is neutered but not entirely absent, though the exits from the couloir require gutsy moves on 60-degree pitched snowfields (that tend to turn to mush in the afternoon sun).
Between these two worlds is a Goldilocks zone: stable, consistent snow in the couloirs, little snow on the traverses, low storm potential, and enough daylight to get it done. My first ascent of the peak back in 2003 was as a summer outing and it was fairly miserable—no snow, lots of people, tons of kicked rocks, and tricky route finding. I made it to the top in good time, but vowed I wouldn’t do Little Bear in those conditions again. It simply wasn’t all that fun.
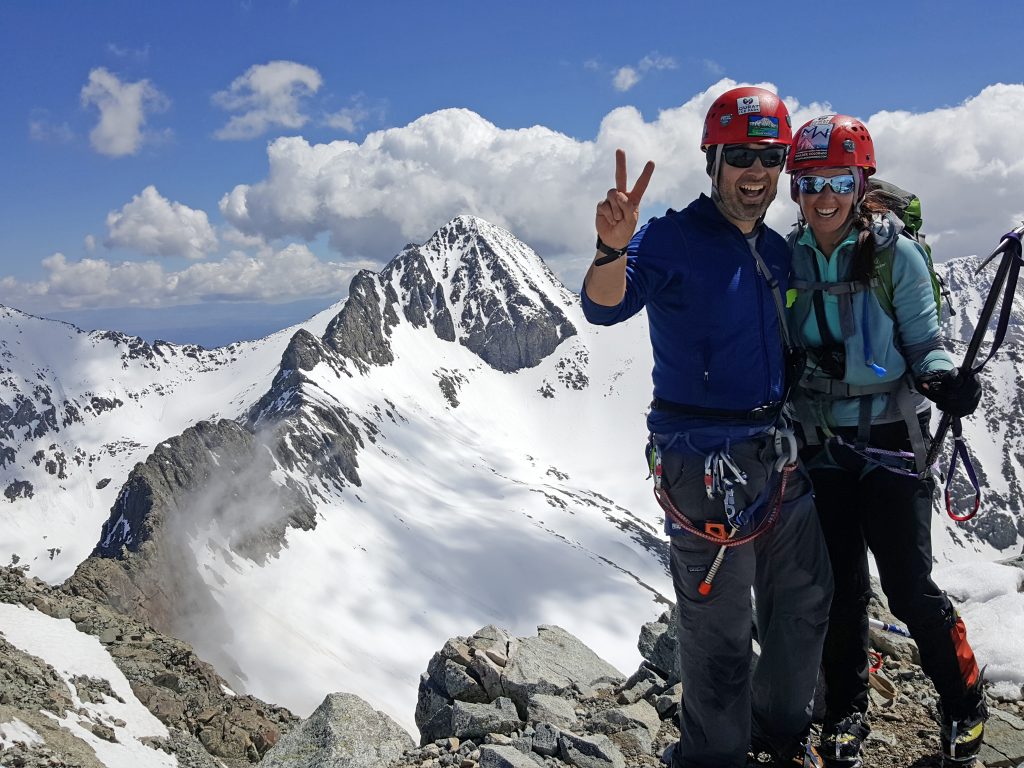
So, as my wife Sheila is closing in on wrapping up the 14ers, I figured it would be fair to pay LB another visit with her. My only condition—we do it when there is good snow on the peak. We actually aimed to get the peak in 2015 but got rained out by a storm that moved in a day early. This year, we were lucky: perfect weather, conditions as good as they can get, and a free weekend. A minor downside is that we were pretty much doing the climb off the couch.
The Approach
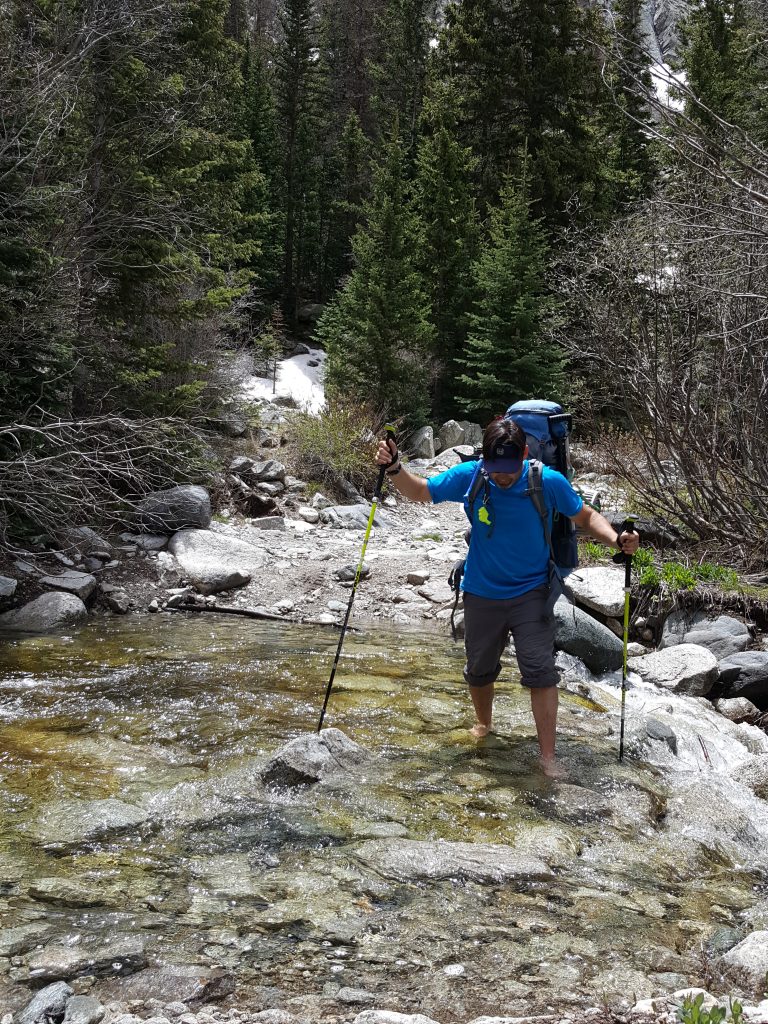
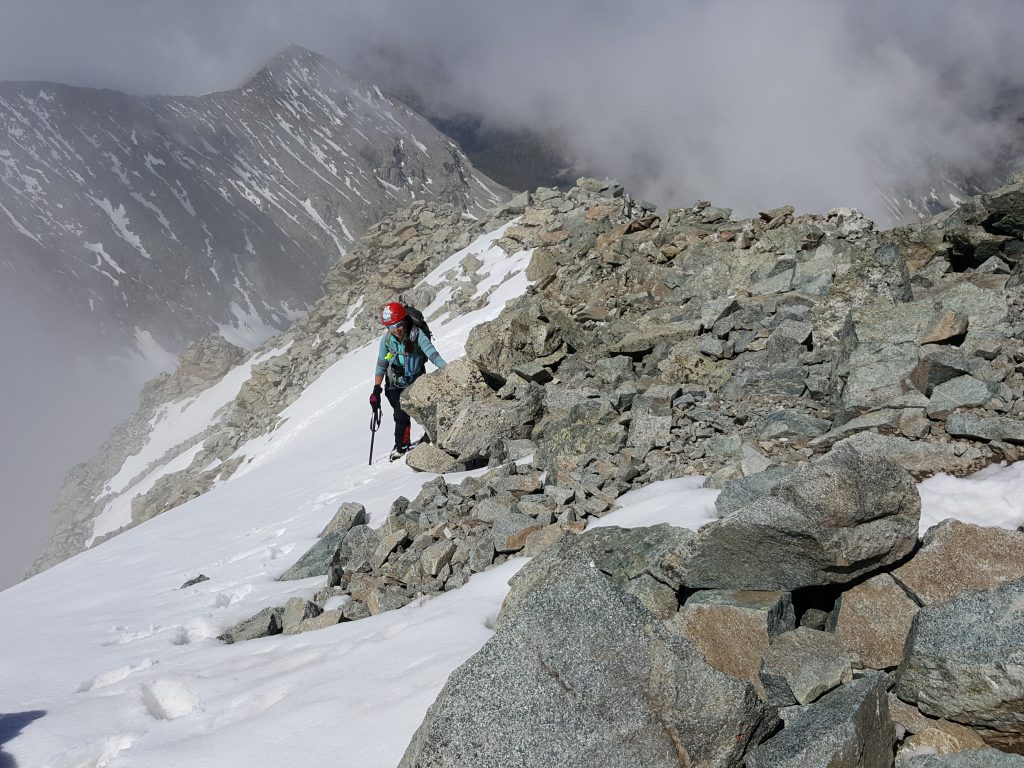
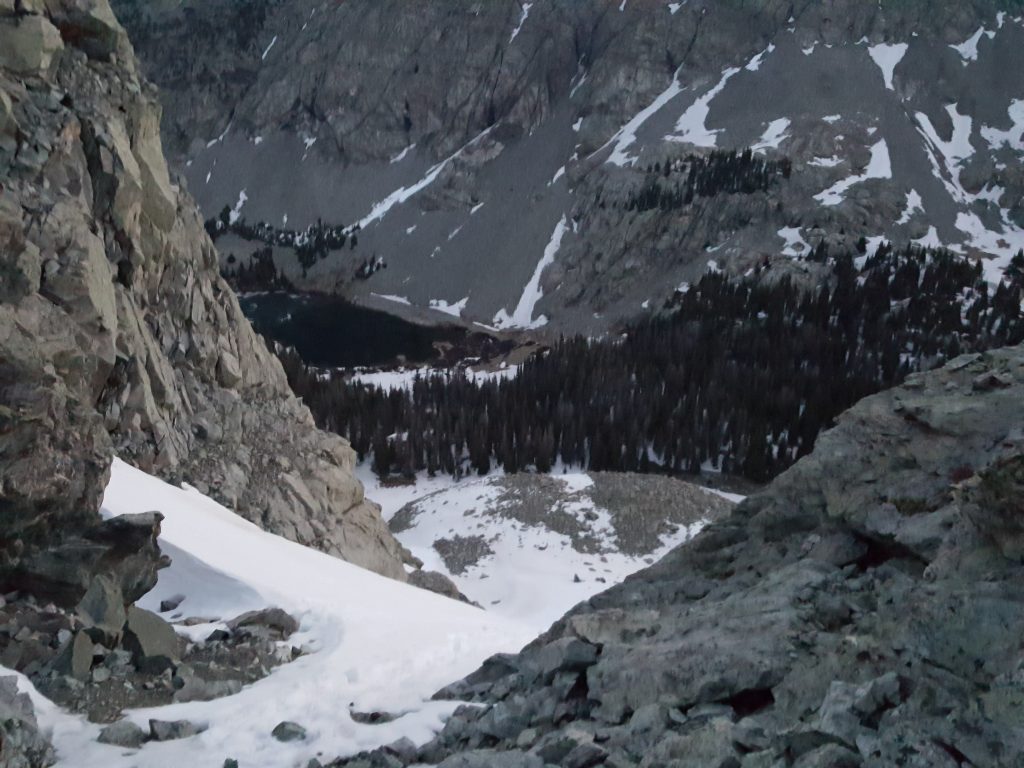
The standard route up the peak doesn’t make anything easy. Most people do the adventure as an overnight, camping at 11,700’ Lake Como. There is a 7-mile 4×4 road to deal with first. The lower 2.5 miles of the road is a ribbon of rounded, jarring stones—bad news for anyone driving low-clearance cars. SUVs can rattle their way up roughly 5.5 miles, depending on how badly they want to beat up their vehicles. Beyond that, a series of tricky road obstacles known as the “Jaws” features limit vehicular travel to dedicated 4×4 Jeeps and rock crawlers. Most climbers have to backpack in at least a few miles before the hike even begins. And, of course, the hike back down after the climb is required. At least we were able to find a good spot to set up our tent and get a good night’s sleep.
The Climb
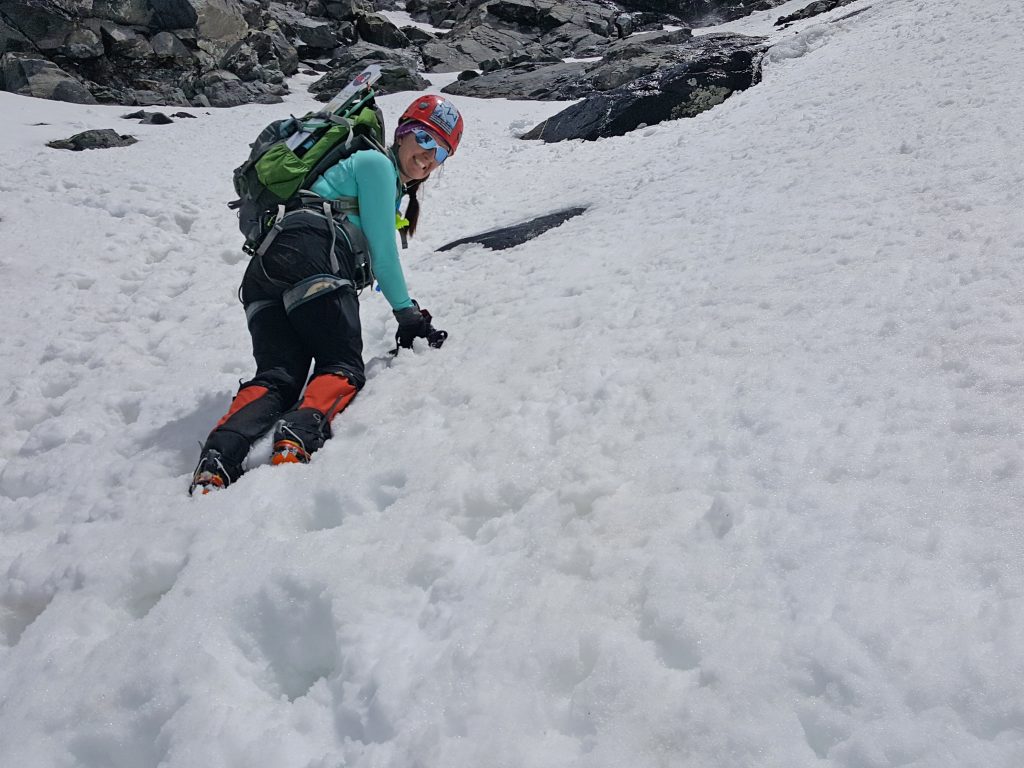
On paper, the standard route has benign stats: 2,300’ of vertical in 3.5 miles as an out-and-back. And yet, giving this climb 8 – 10 hours isn’t unreasonable. We started at 3AM even though we had a perfect forecast—remember, we’re coming off the couch, here! The route began with a bushwhack through a short section of forest around the lake. Post-holing ensued for about 20 minutes until we got above the foliage, and began the “warm-up”, a 600-vertical foot couloir that cracks the west ridge. Snow conditions were perfect and we were able to kick steps in the darkness.
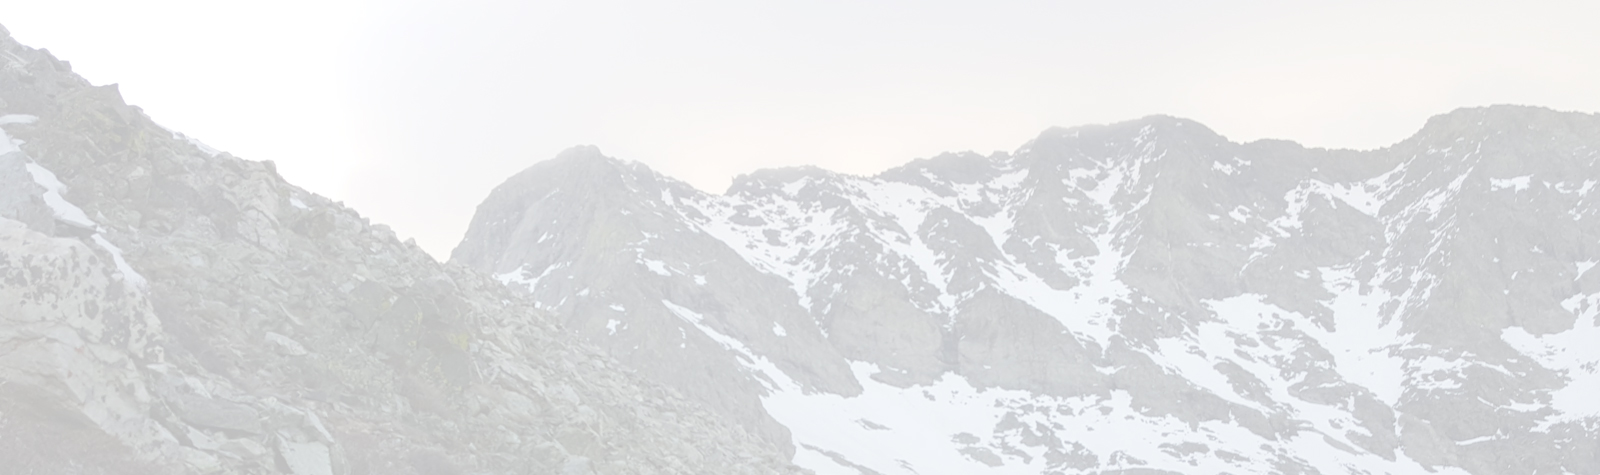
At the top notch, we removed our crampons and switched out our ice axes for hiking poles to traverse a mile or so of broken but reasonably solid class 2+ rock. The trail here is semi-marked by cairns and skirts below the west ridge. Eventually, the traverse hits a pair of snowfields that ascend on 25-degree slopes to the base of the Hourglass Couloir at 13,300’.
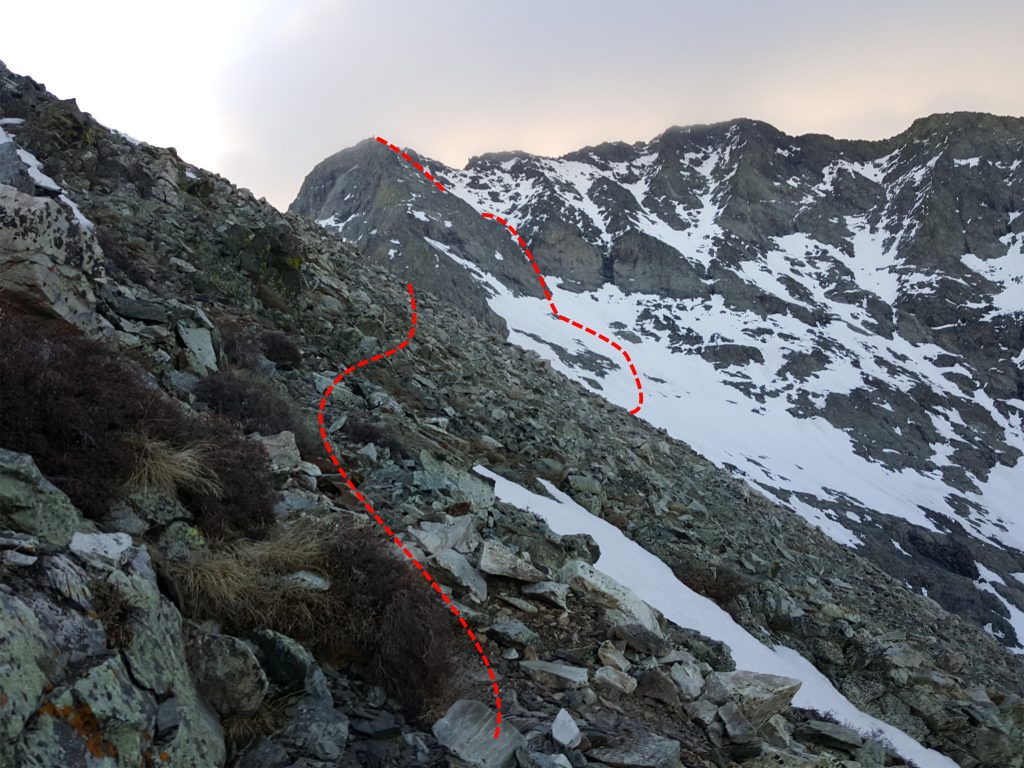
The Hourglass and Beyond
The snow was fantastic in the Hourglass. It was consolidated, thick enough to sink crampons and ice axes, and fully in. The actual Hourglass proper is rather tame—150 feet up to a heart-shaped, ice-slicked, boulder that serves as an anchor for summer routes. An old, blue rope slipped out of the snow and over the stone like a varicose vein. At this anchor, climbers have to make a critical choice: exit left for the steep but more direct way to the top, or skirt right for a longer, more sustained snow climb on modest 35-40 degree slopes. We opted to go left.
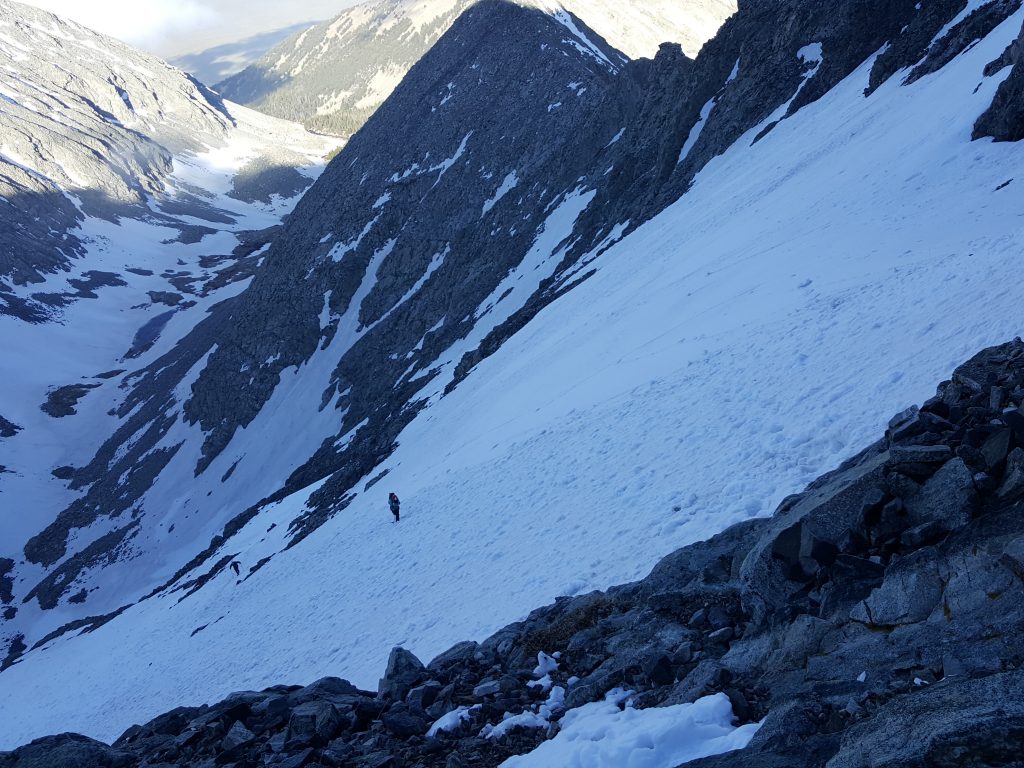
In my opinion, this left exit is the crux of the route. The snow ribbon terminates at a craggy wall, where exiting means a tricky, no-fall-zone class 4 scramble through a 12-foot section of rock that was iced over in places. A better exit is about 50 feet below this, where crossing over a few rocky patches leads to the 60-degree snow slope that eventually twists up to the top (bear right, crossing a stone spine in the ridge to the final snowfield).
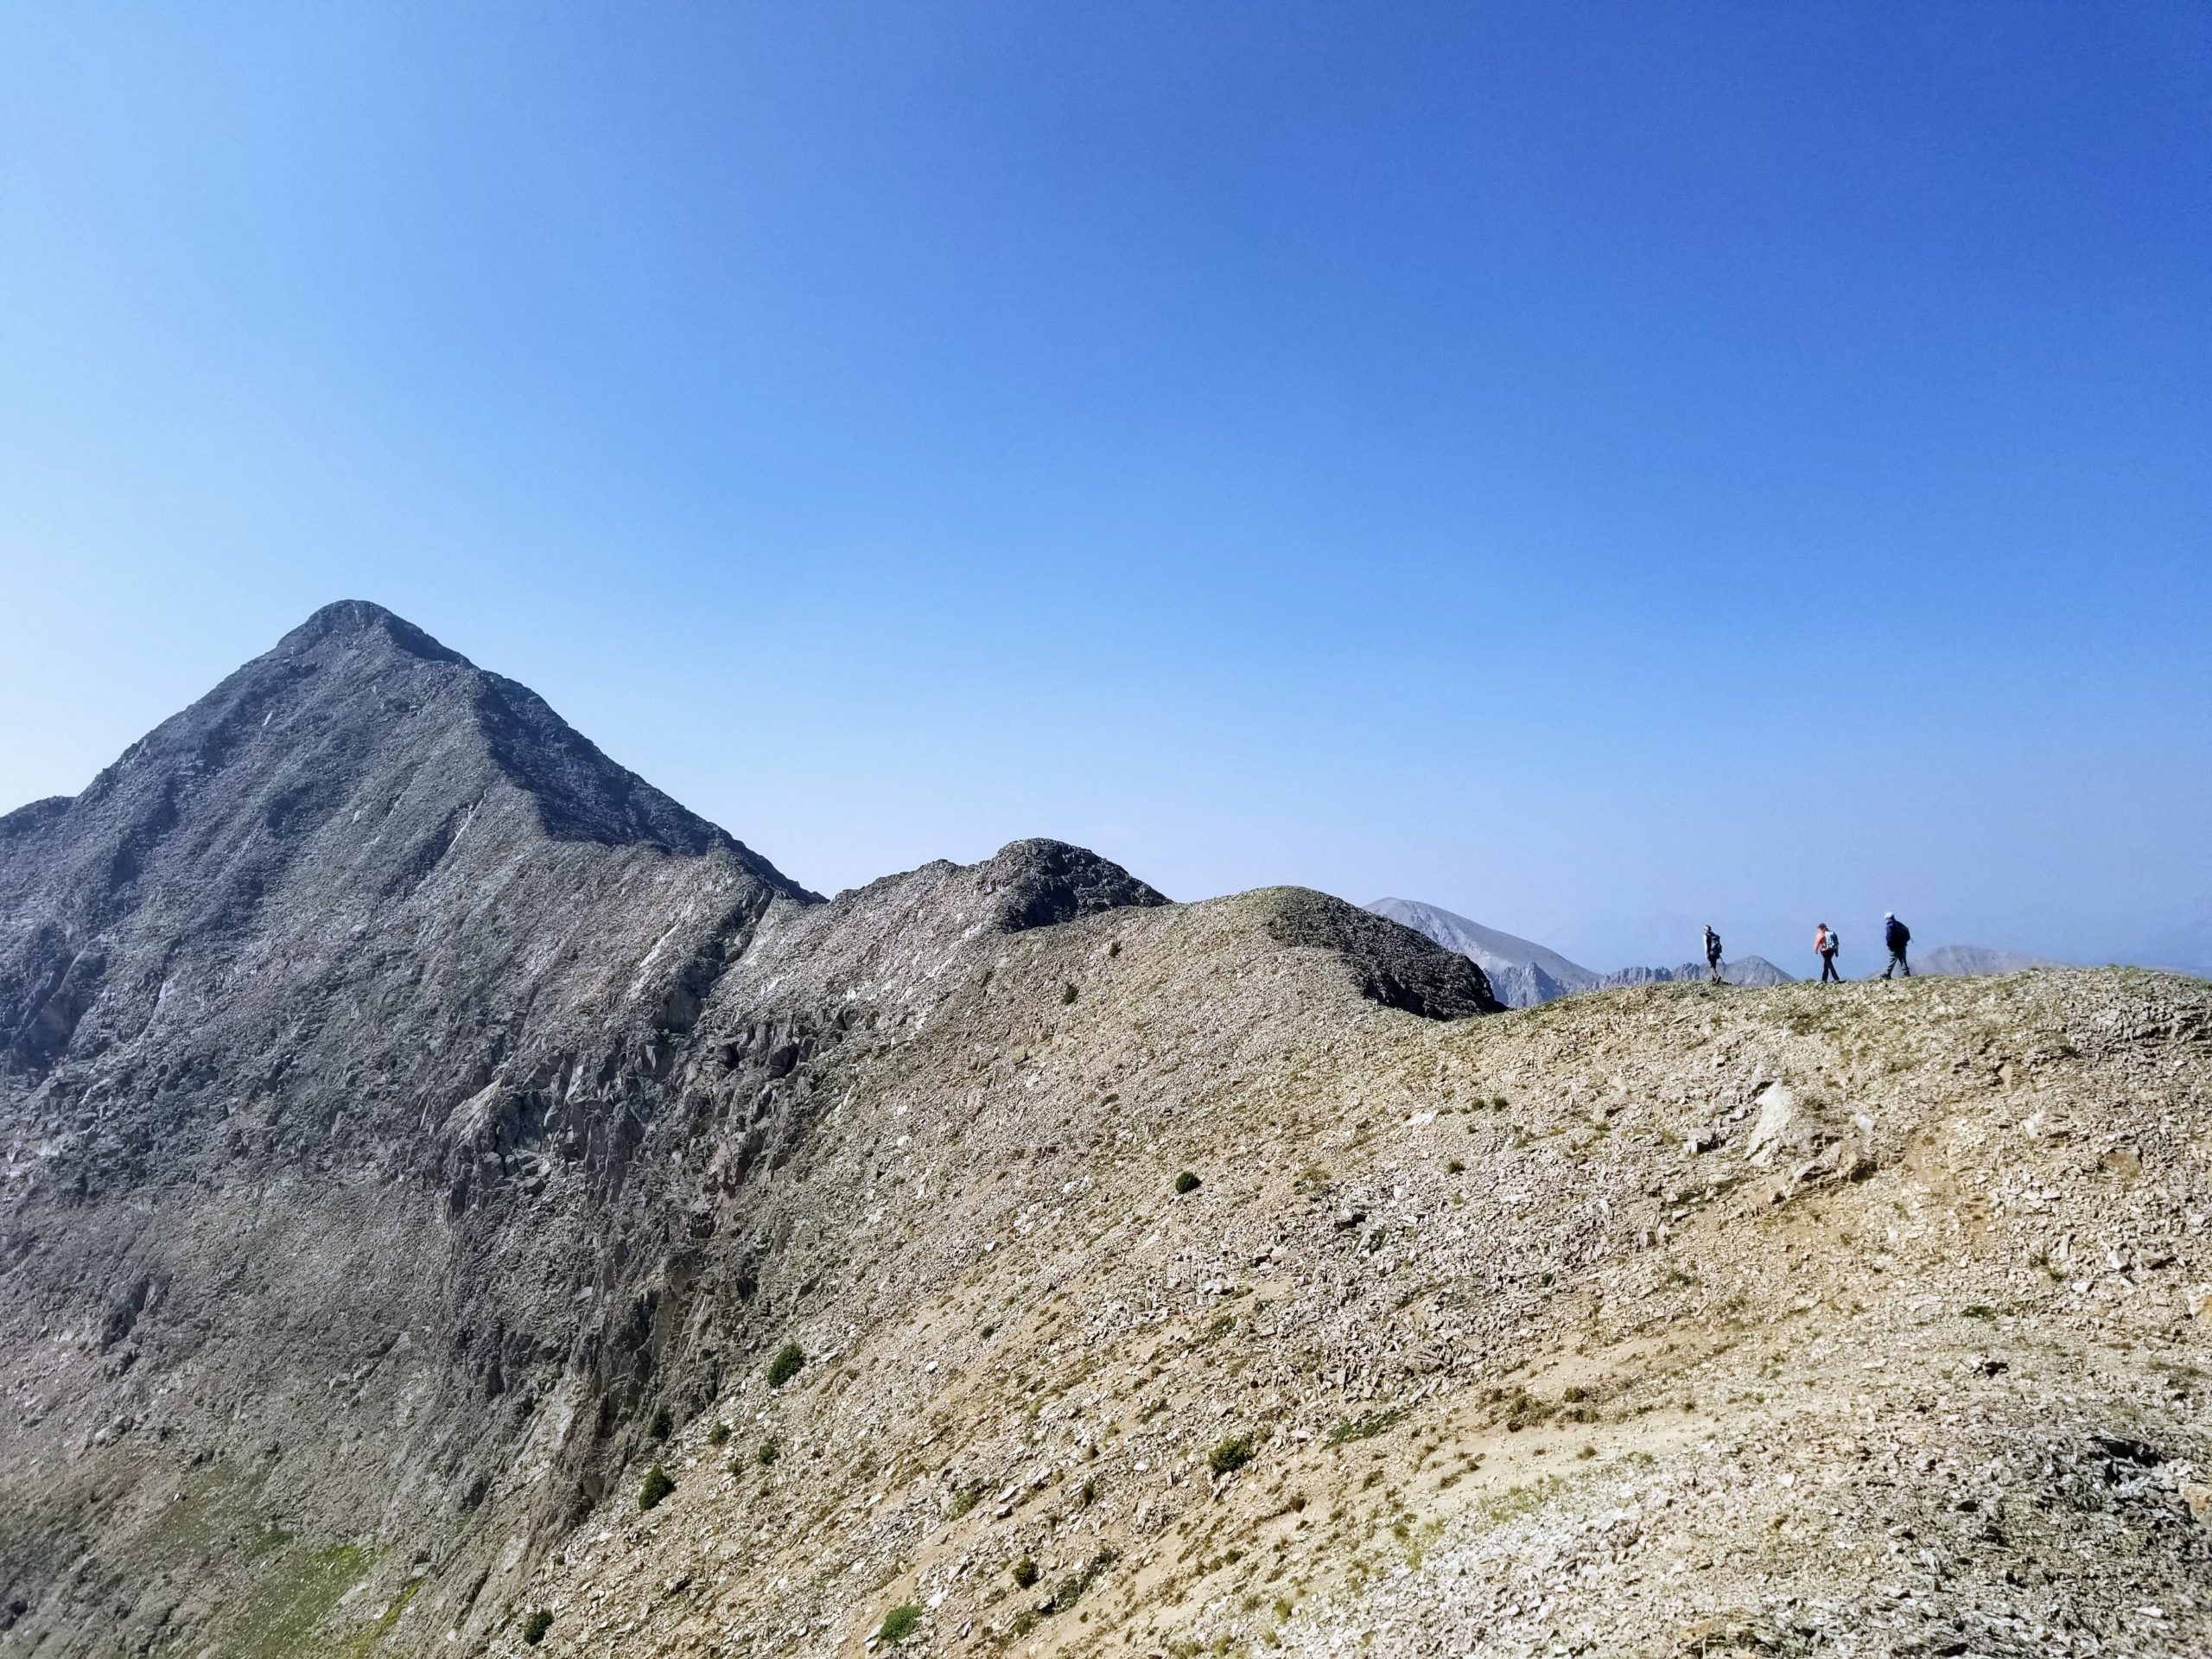
Either way leads to a snowfield that trends up to a stubby spine of rock that separates this portion from the final summit snowfield. Heading climbers right, we scampered over rock, snow, then rock again before breaching the final 100 feet of snow. Blue sky and blazing white snow are all the eye can see until reaching the highpoint on the ridge. Mercifully, the summit is only about 80 feet from the top-out point. It’s a flat, welcoming place with utterly spectacular views of 14,345’ Blanca Peak to the north and the sun-baked farms in the flat lands below.
The return down starts off easily enough. Retracing the snowfield and rock crossings and snow patches was quick going. It wasn’t until we reached the aforementioned crux section that stood between the Hourglass proper and the upper mountain that we really had to have our A-game on. The downclimb on 60-degree snow for a good 200 feet or so is relatively easy if snow conditions are good (as they were for us). It’s worth noting that we did bring an alpine rope (30m, 9.1mm dry rope), ice pickets, and harnesses for the day, though we never used them. This section is the reason why: if it had been melted out, ice-hard, or unconsolidated, protection is a wise idea. But, we just moved vigilantly down the snow, across a rock band, and slowly back to the Hourglass anchor, where the angle eases up. The first 70’ of the Hourglass we descended face in, but the last 75’ or so we could plunge step face-out.
The Final Steps to the Finish
We scampered across the snow slopes, back to the dry traverse, where we once again removed our crampons and stashed our ice axes. After an uneventful crossing, we were back at the notch. If the conditions are soft and you are a confident glissader, this can be a zippy descent. As it was, conditions were soft enough to face out plunge step most of the route. A 70’ section near a narrow choke in the middle of the route was a bit thin, so we opted to turn face-in for a few steps, before glissading down the lower quarter of the gully. One more post-hole-ridden traverse through the woods and we were back at camp, having tagged the top of Little Bear and happy for a brief rest—we still had a 4-mile backpack down to our 4Runner, parked 3 miles up the Lake Como road.
Thoughts and Observations
While we could have used a bit more training before heading up, we had a solid-but-long day. Fit, confident, climbers can knock this one out in 5 – 7 hours (in snow conditions) but I’d give 7 – 10 hours if you’re moving more cautiously or want to set up anchors. If you’re hoping to knock this one out from a camp on the road, hopefully, you’ll have a 4×4 that can get up between 5 to 5.5 miles to reduce the tedium of a long day hike.
It’s worth noting the really bouncy rocks last for about 3 miles—the road actually improves from about mile 3.5 until the first SUV-blocking obstacle about 5.5 miles up.